

How to Migrate Data Between Services
This guide explains how to migrate data from one account or server to another.
Your service hostname, SSH/FTP username and SSH/FTP password can be found in the Client Area under your service details.
Method 1 – FileZilla Client
This is the easiest method for data migration if you prefer using a graphical interface.
Go to your service details page in the Client Area and install FileZilla Client from the available Apps section.
Open the provided URL and log in using your FileZilla Client credentials. This will open the FileZilla FTP client in your browser.
Fill in the FTP server details in the Quickconnect fields for the server you want to connect to:
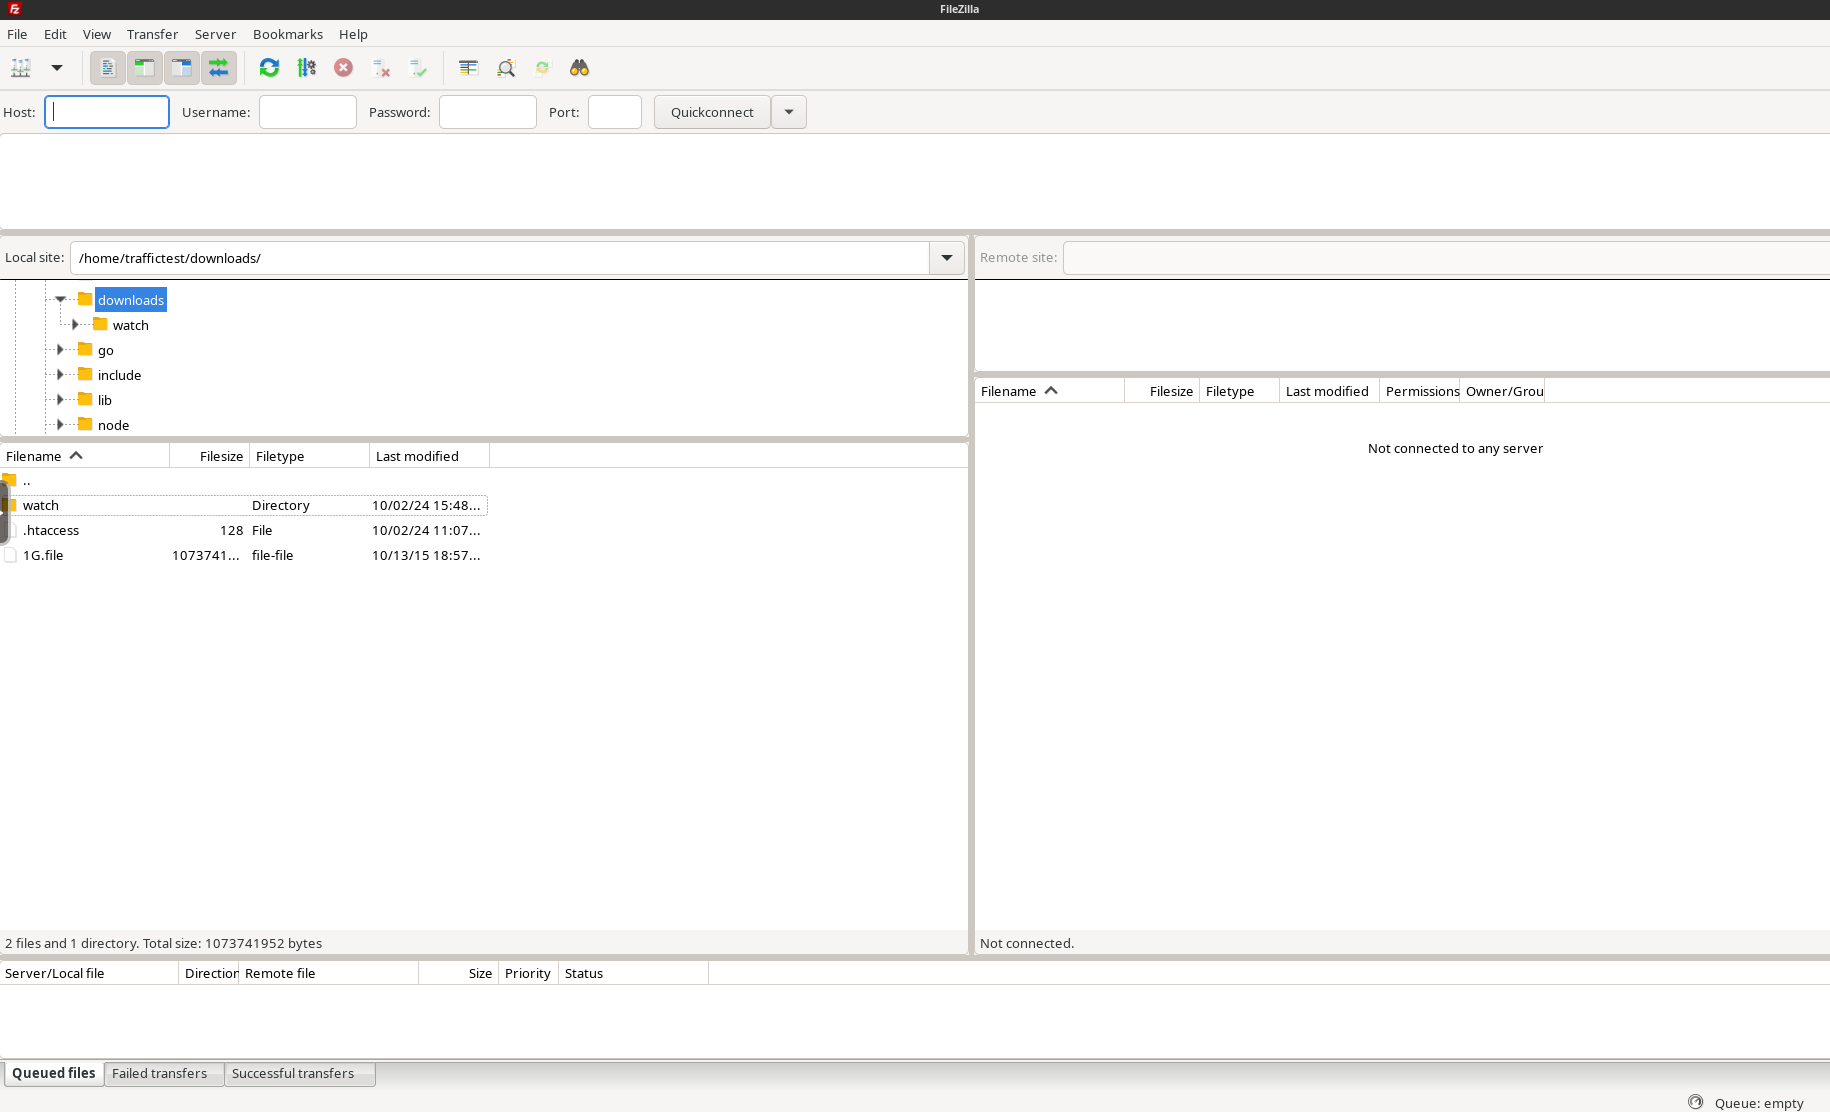
- Host – server hostname or IP address.
- Username – FTP username.
- Password – FTP password.
- Port – FTP port, usually 21 for FTP or 22 for SFTP.
Click Quickconnect.
After connecting, you will see two file panels:
- Local site on the left side – files on the server where FileZilla Client is installed.
- Remote site on the right side – files on the FTP/SFTP server you connected to.
On the left side, find the /homeXXX folder and open the folder with your username. This is where your local service files are located.
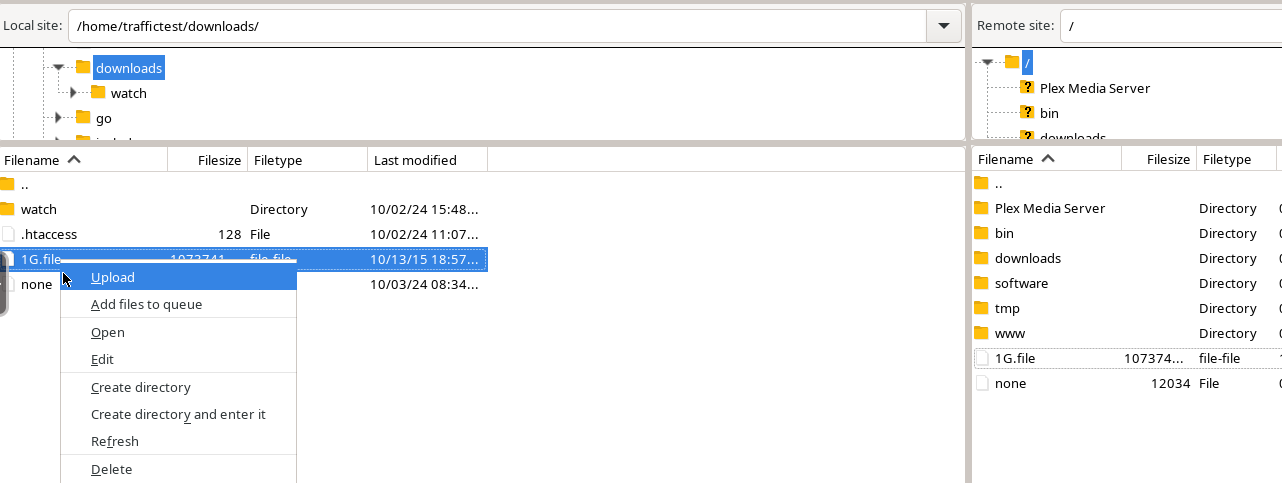
To copy data from the Local site on the left side to the Remote site on the right side, select the files or folders you want to transfer, right-click them and choose Upload.
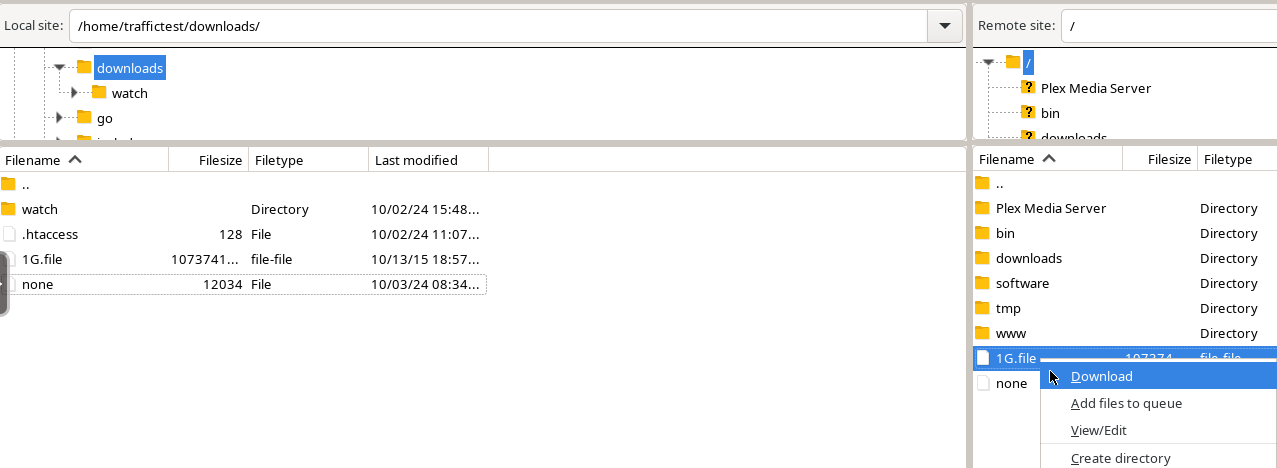
To copy data from the Remote site on the right side to the Local site on the left side, select the files or folders you want to transfer, right-click them and choose Download.
FileZilla Client is easy to use, but for large migrations we recommend using rsync, as it is usually more reliable and can resume interrupted transfers.
Method 2 – rsync over SSH
rsync is recommended for larger migrations because it can copy only missing or changed files and resume transfers if they are interrupted.
First, log in via SSH to the account from which you want to transfer data.
rsync uses the following format:
rsync OPTION SRC DEST
- SRC – source files or directories you want to transfer.
- DEST – destination path where the files should be transferred.
Start a screen Session
For large migrations, we recommend running rsync inside a screen session. This allows the transfer to continue even if your SSH session disconnects.
Start a new screen session:
screen -dmS transfer
Enter the screen session:
screen -r transfer
You can now start your rsync transfer inside this screen session.
To detach from screen without stopping the transfer, press CTRL+A, then D. You can later return to the transfer with screen -r transfer.
Transfer the downloads Directory to Another Server
If all files you want to transfer are stored in ~/downloads and you want to transfer them to the destination server, use:
rsync -auH --numeric-ids --progress --exclude=filezilla --exclude=watch --exclude=vpn --exclude=.htaccess -e ssh ~/downloads user@server.seedhost.eu:~/
Replace:
- user with your SSH username on the destination server.
- server.seedhost.eu with your destination server hostname.
You will be asked to accept the SSH key and enter your password. After that, the transfer will start.
Return to the Transfer Later
If you detached from the screen session, you can return to it with:
screen -r transfer
When the transfer is finished and you no longer need the screen session, terminate it with:
screen -X -S transfer quit
rsync Examples
Transfer a Specific Folder from downloads
If you want to transfer only one folder from your ~/downloads directory to ~/downloads on the destination server, use:
rsync -auH --numeric-ids --progress --exclude=filezilla --exclude=watch --exclude=vpn --exclude=.htaccess -e ssh ~/downloads/FILES user@server.seedhost.eu:~/downloads
This command transfers the FILES folder from your local ~/downloads directory to ~/downloads on the destination server.
Transfer a Different Source Directory and Keep the Directory Structure
If another provider stores your files in a different directory, for example ~/data, and you want to transfer the whole directory while keeping the directory structure, use:
rsync -auH --numeric-ids --progress --exclude=filezilla --exclude=watch --exclude=vpn --exclude=.htaccess -e ssh ~/data user@server.seedhost.eu:~/
This will transfer the whole ~/data directory to the destination server.
Transfer Only the Contents of a Directory
If another provider stores your files in ~/data and you want to transfer everything inside that directory into ~/downloads on the destination server, use:
rsync -auH --numeric-ids --progress --exclude=filezilla --exclude=watch --exclude=vpn --exclude=.htaccess -e ssh ~/data/* user@server.seedhost.eu:~/downloads
This transfers the contents of ~/data into the destination ~/downloads directory.
Useful rsync Options
-a– archive mode, preserves file attributes.-u– skip files that are newer on the destination.-H– preserve hard links.--numeric-ids– preserve numeric user and group IDs.--progress– show transfer progress.--exclude– exclude selected files or folders from the transfer.-e ssh– use SSH as the transport method.
Check rsync Help
For more rsync options, run:
rsync -h
Verification
Before starting a large migration, make sure the destination path is correct. Using the wrong destination path may copy files into an unexpected directory.
If rsync starts transferring files and shows progress, your migration is running correctly. You can safely detach from screen and return to the transfer later if needed.
