METHOD 1
Please go to https://www.plex.tv/claim website, log in with your Plex account if you are not logged and you will get your claim code there, starting with claim-XXXX. Please note that claim code is valid 5 minutes only, after 5 minutes you need to refresh the claim website to get a new one. Now go to our Client Area, go to your service details page and to Apps tab. Find Plex under Apps list and reveal MANAGE button, use Claim option from the drop down menu. A new window will pop-up, please put your claim code there and click CLAIM button. If everything has been OK, your Plex is claimed and ready for use.
METHOD 2
Please go to https://www.plex.tv/claim website, log in with your Plex account if you are not logged and you will get your claim code there, starting with claim-XXXX. Now you need to create claimplex.txt file in your Plex Media Server folder via FTP or SSH and put your claim code there. When it is done, go to our manager and update Plex with "Upgrade Plex Server" button. When your Plex is claimed, the file with your claim code will be removed and you can use your Plex.
Please note that claim code is valid 5 minutes only, after 5 minutes you need to refresh the claim website to get a new one.
METHOD 3
1. Connect to your VNC service. Open a web browser and use this URL: localhost:32400/web
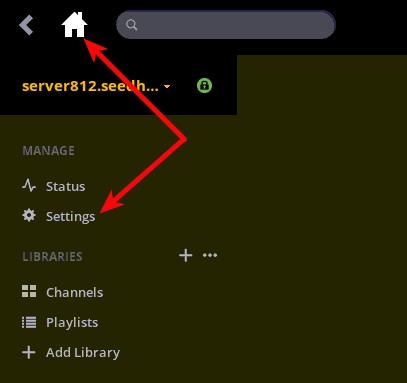
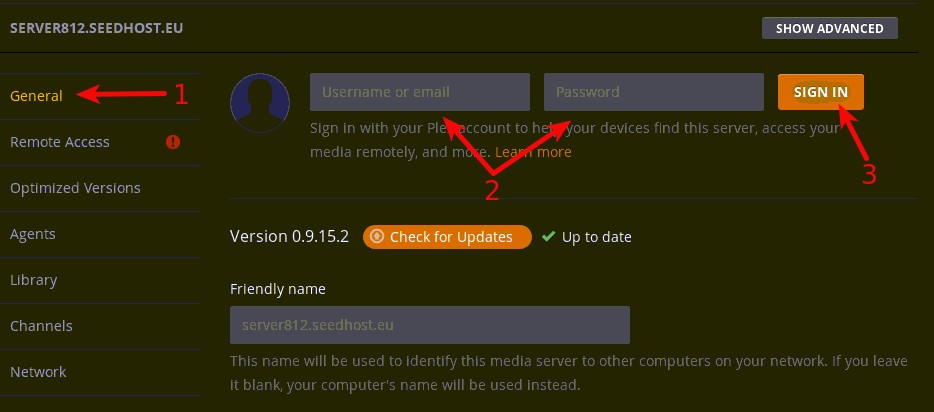
2. When your plex interface loads, go to the „Settings” → „General” and fill in your plex account details. Firstly, you need to sign in to your plex account. If you don't have a plex account you need to create it.

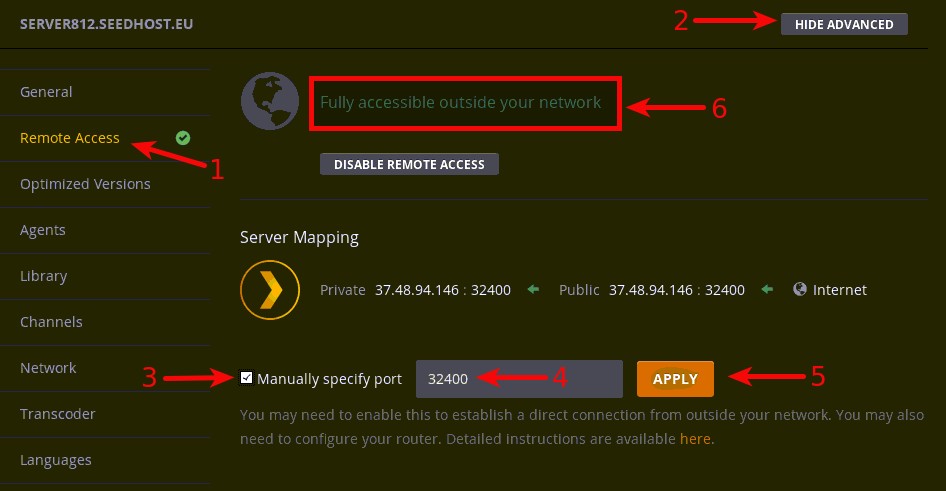
3. Now when you have signed in to your plex account, you should get a red icon under the Remote Access menu. If not, then go there:
1. Click on Remote Access.
2. Click on the "Show Advanced" button and advanced configuration will appear.
3. Tick on the Manually specify port.
4. Type port 32400 in a field.
5. Apply configuration.
If everything is OK you will get info „Fully accessible outside your network”. If not please open a support ticket.
Now your plex is accessible outside the server network, you can access it with your web browser with the following URL http://server.seedhost.eu:32400/web (where server.seedhost.eu is your server hostname) or with your plex account from any of your devices.


