Knowledgebase
Portal Home > Knowledgebase > How-to > Hosting > Other software > Pydio - startup configuration
Pydio - startup configuration
This article describes how to configure Pydio. Pydio is a very powerful php web based filemanager.
Firstly, install it from your manager, you can find it in your service details under "Addons" tab. When you install pydio you will get an URL, please visit this URL and proceed with the configuration below.
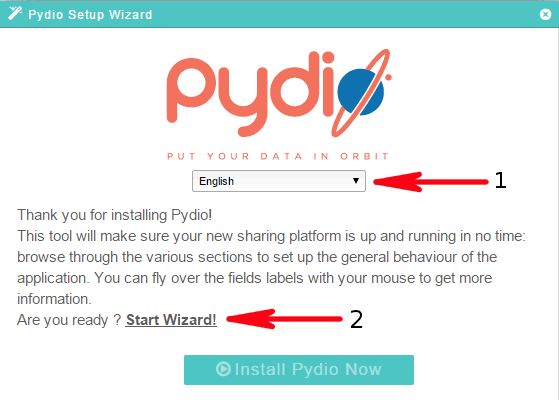
1. Choose your language.
2. Click on "Start Wizard!" button.
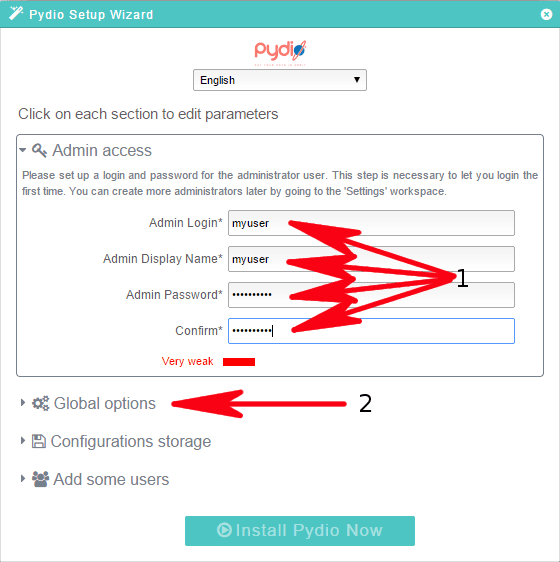
1. Chose your preferred admin username, name and password.
2. Click on "Global options" to go to the next config.
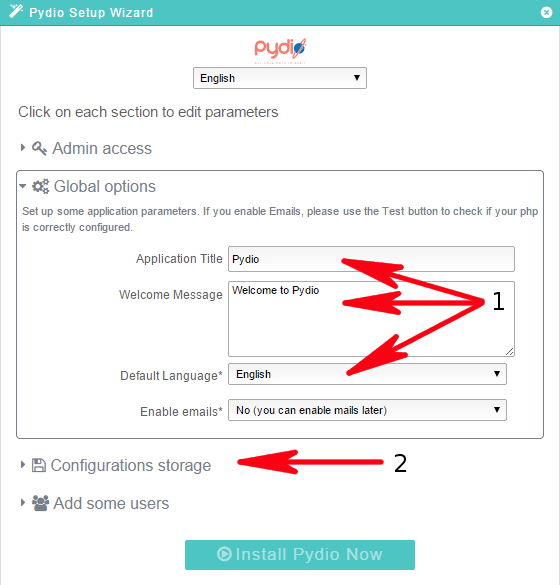
1. Choose your pydio title, welcome message and default language, it can be changed later so you can leave it default.
2. Click on "Configurations storage" to go to the next config.
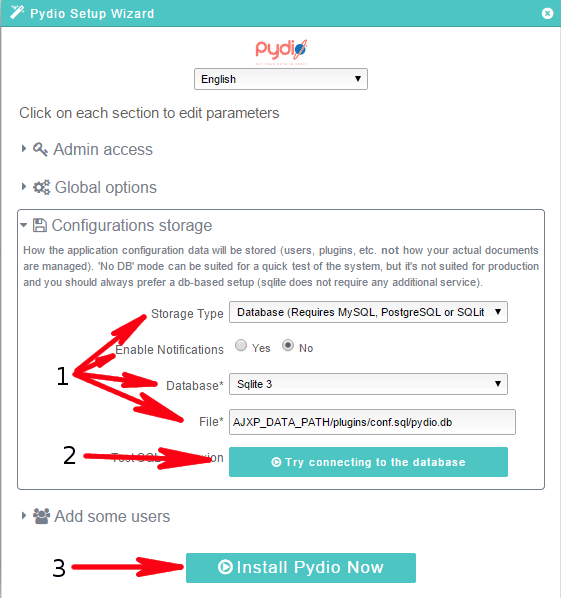
1. Please choose everything the way it's on this screen.
2. Click on "Try connecting to the database" button to check if everything is OK. If everything is OK you will get info that it's OK and you can go to #3. Otherwise, please check if you did everything like on the sceenshot above.
3. Click on "Install Pydio Now" button and pydio will start installation.
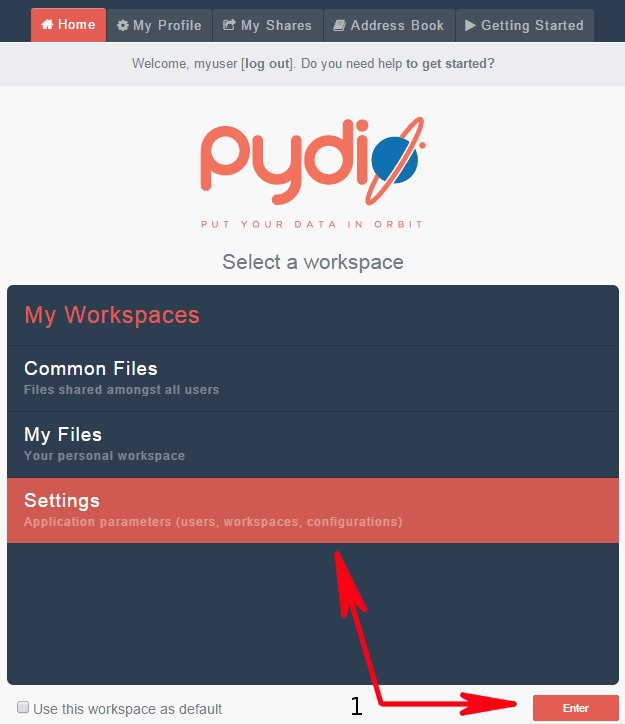
After installation please login to pydio with your admin username. Now we will do the final installation so that all pydio features will work.
1. Choose settings and press "Enter".
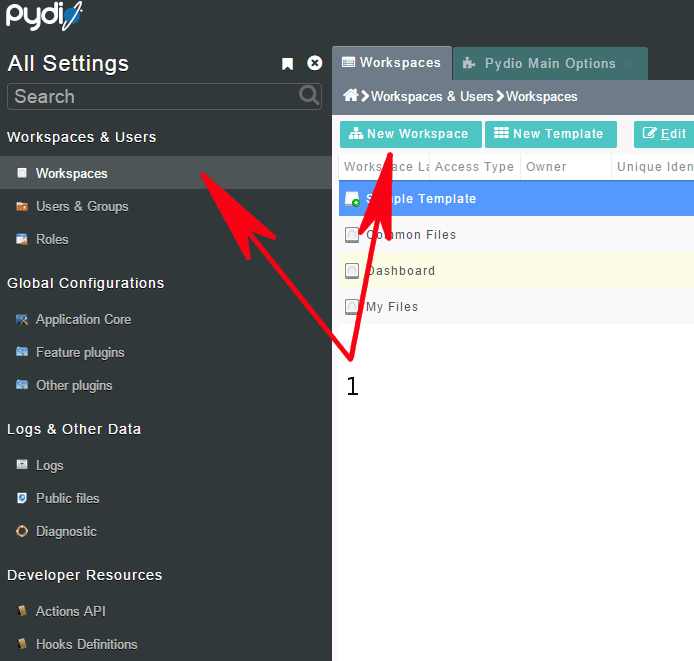
1. On the left menu choose "Workspaces" and then "New Workspace" button.
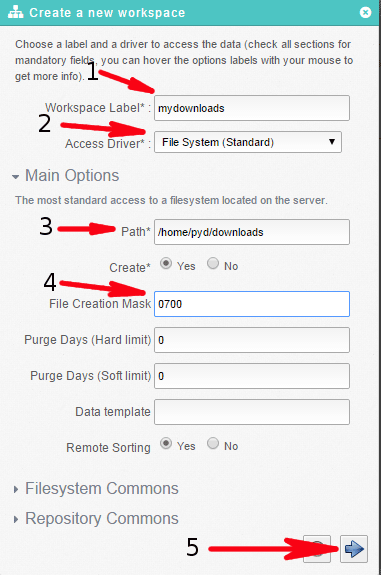
1. Workspace label - name it the way you want
2. Access drive - choose like on the screen
3. Path - add path to your downloads, you can find it in your rutorrent under general tab in any of your torrents.
4. File creation mask - 0700 like on the screen.
5. Click next.
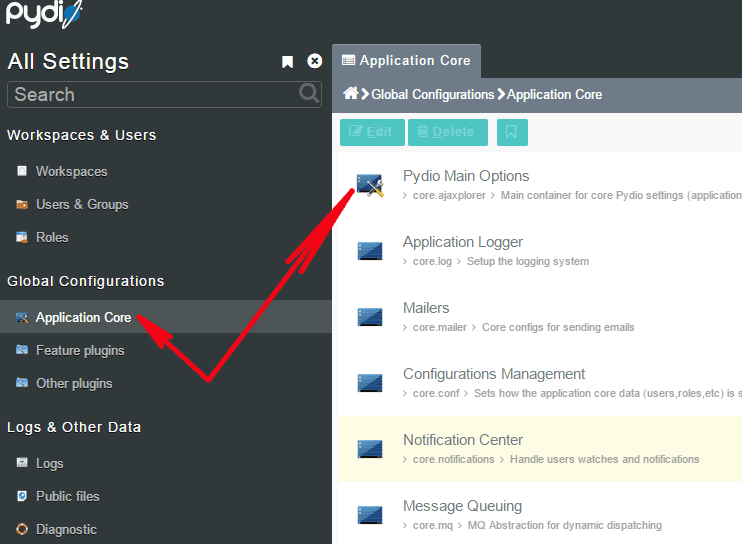
Now click on the left menu "Application Core", then on the right "Pydio Main Options".
1. Please type your pydio URL, you can find it in your manager.
2. Now click on "Save" button to finalize pydio installation.
![]() Add to Favourites
Add to Favourites  Print this Article
Also Read
Powered by WHMCompleteSolution
Scroll to top


